Creating a Panorama
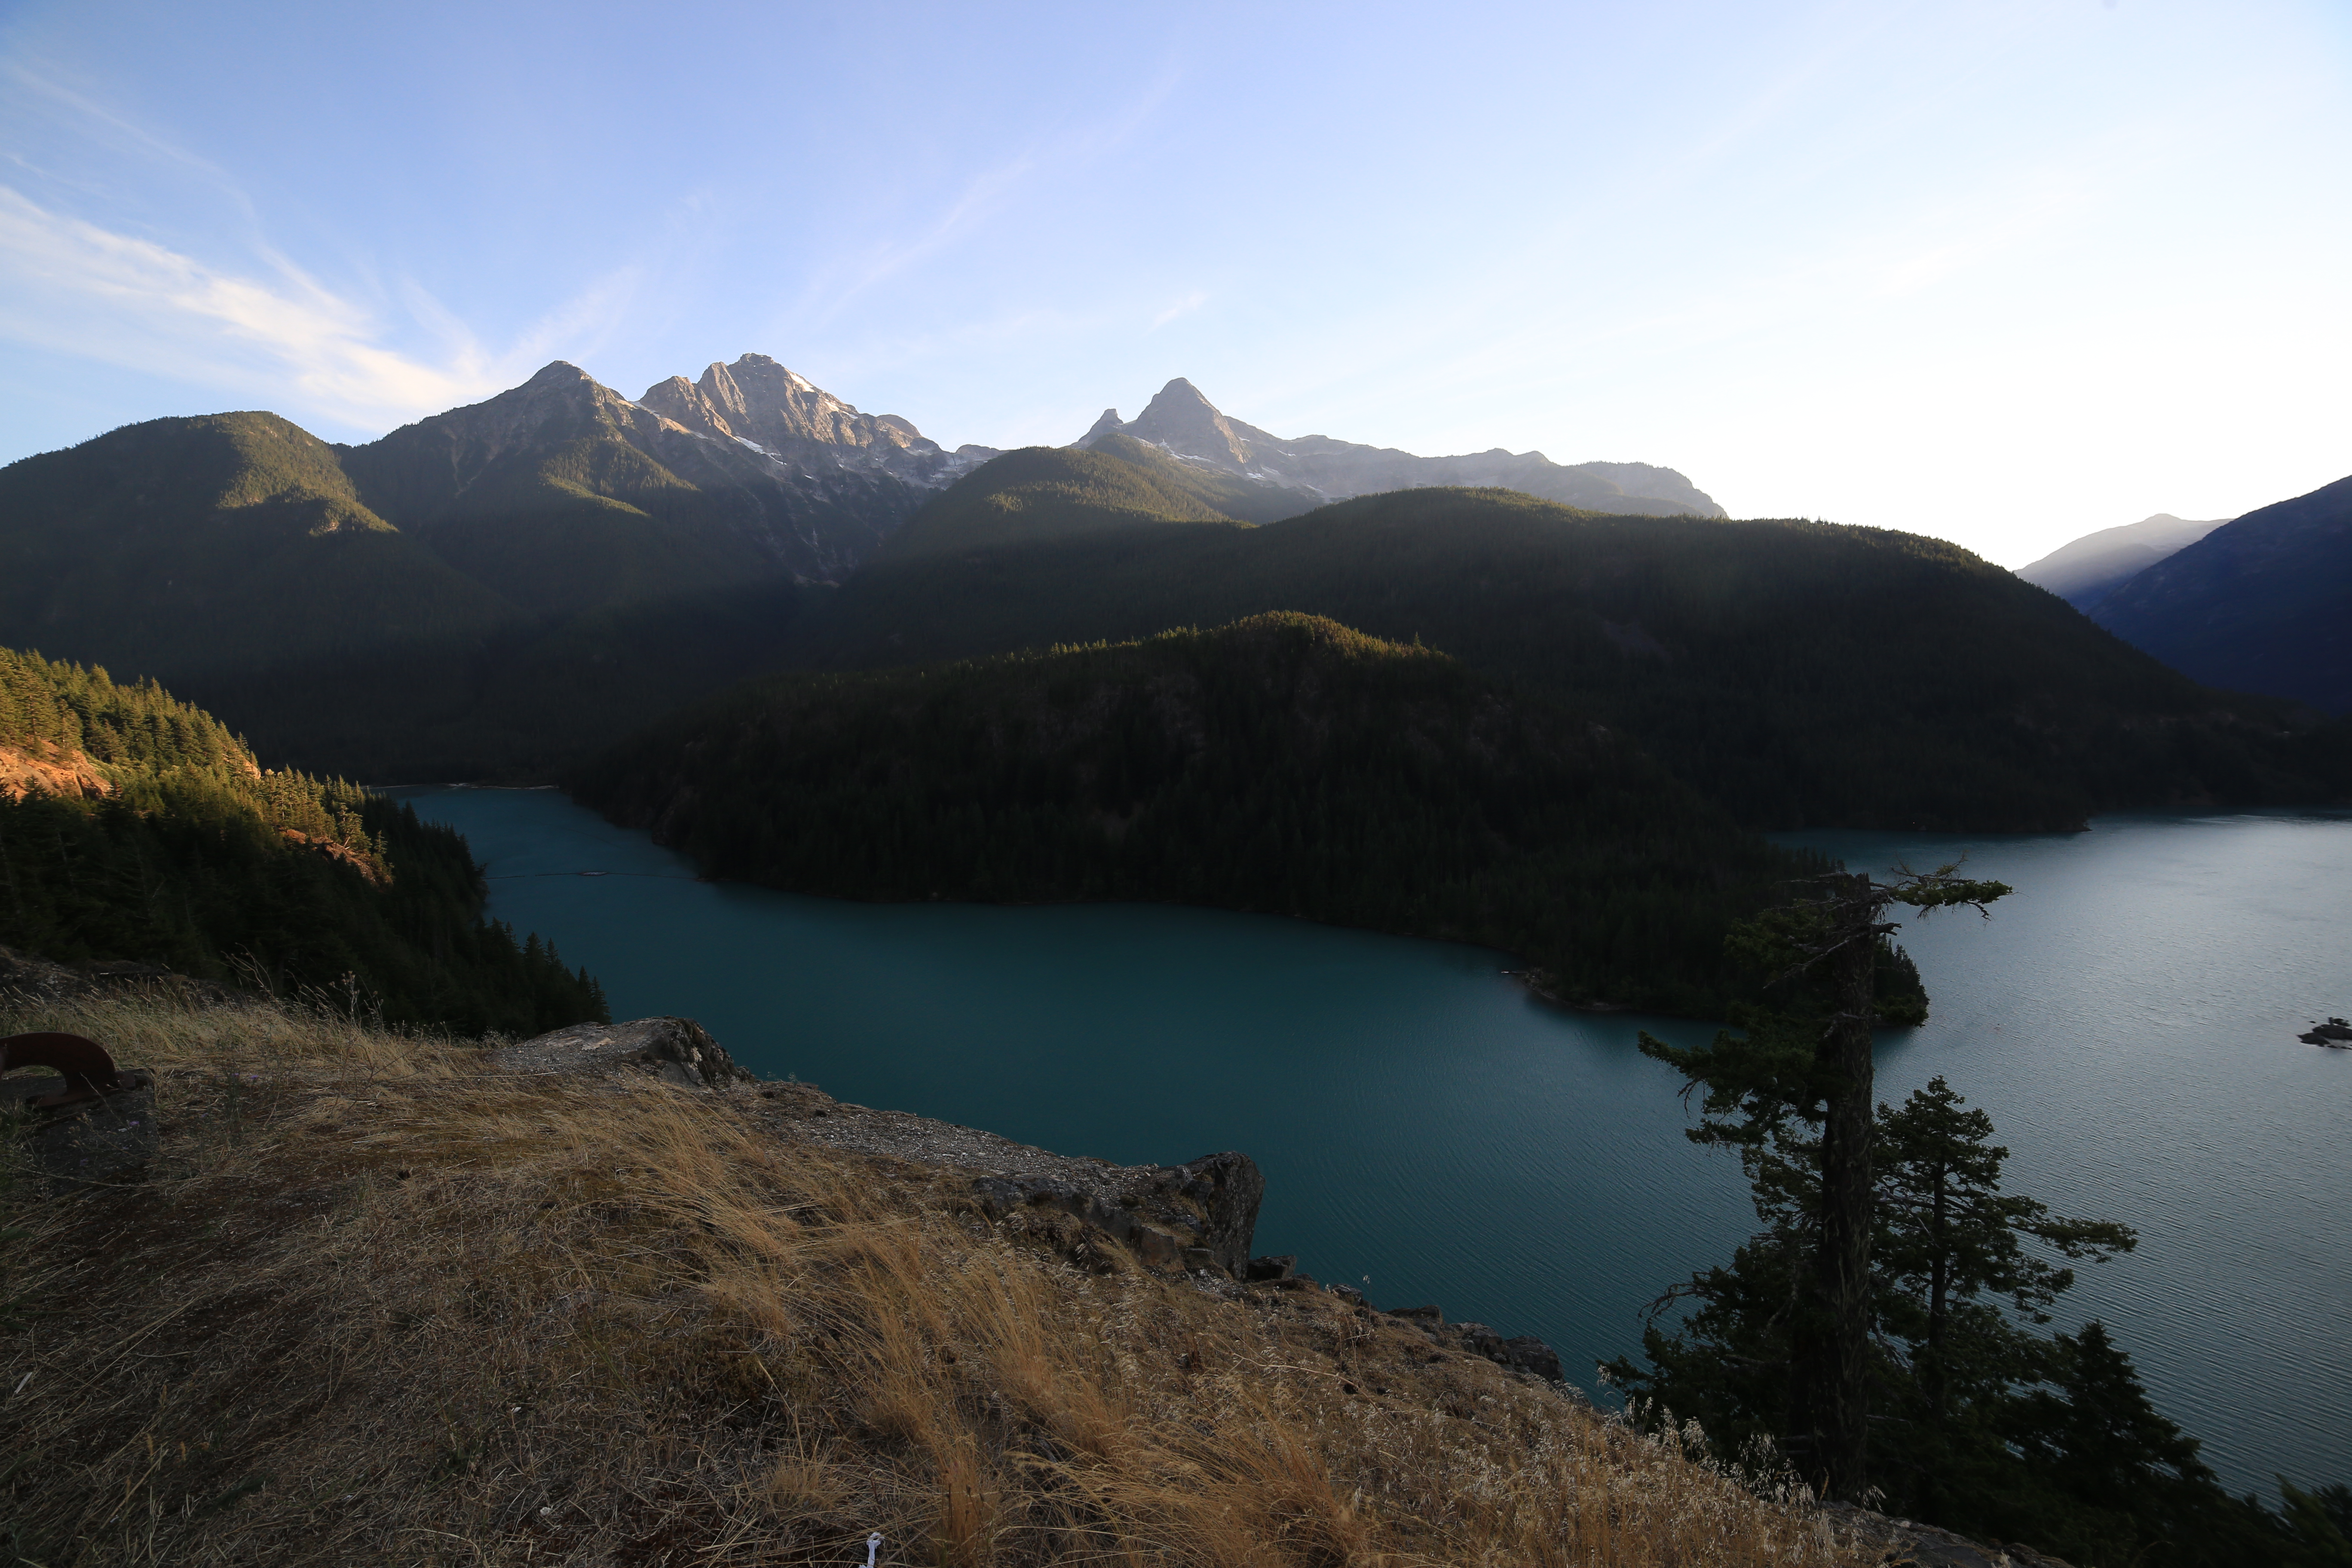
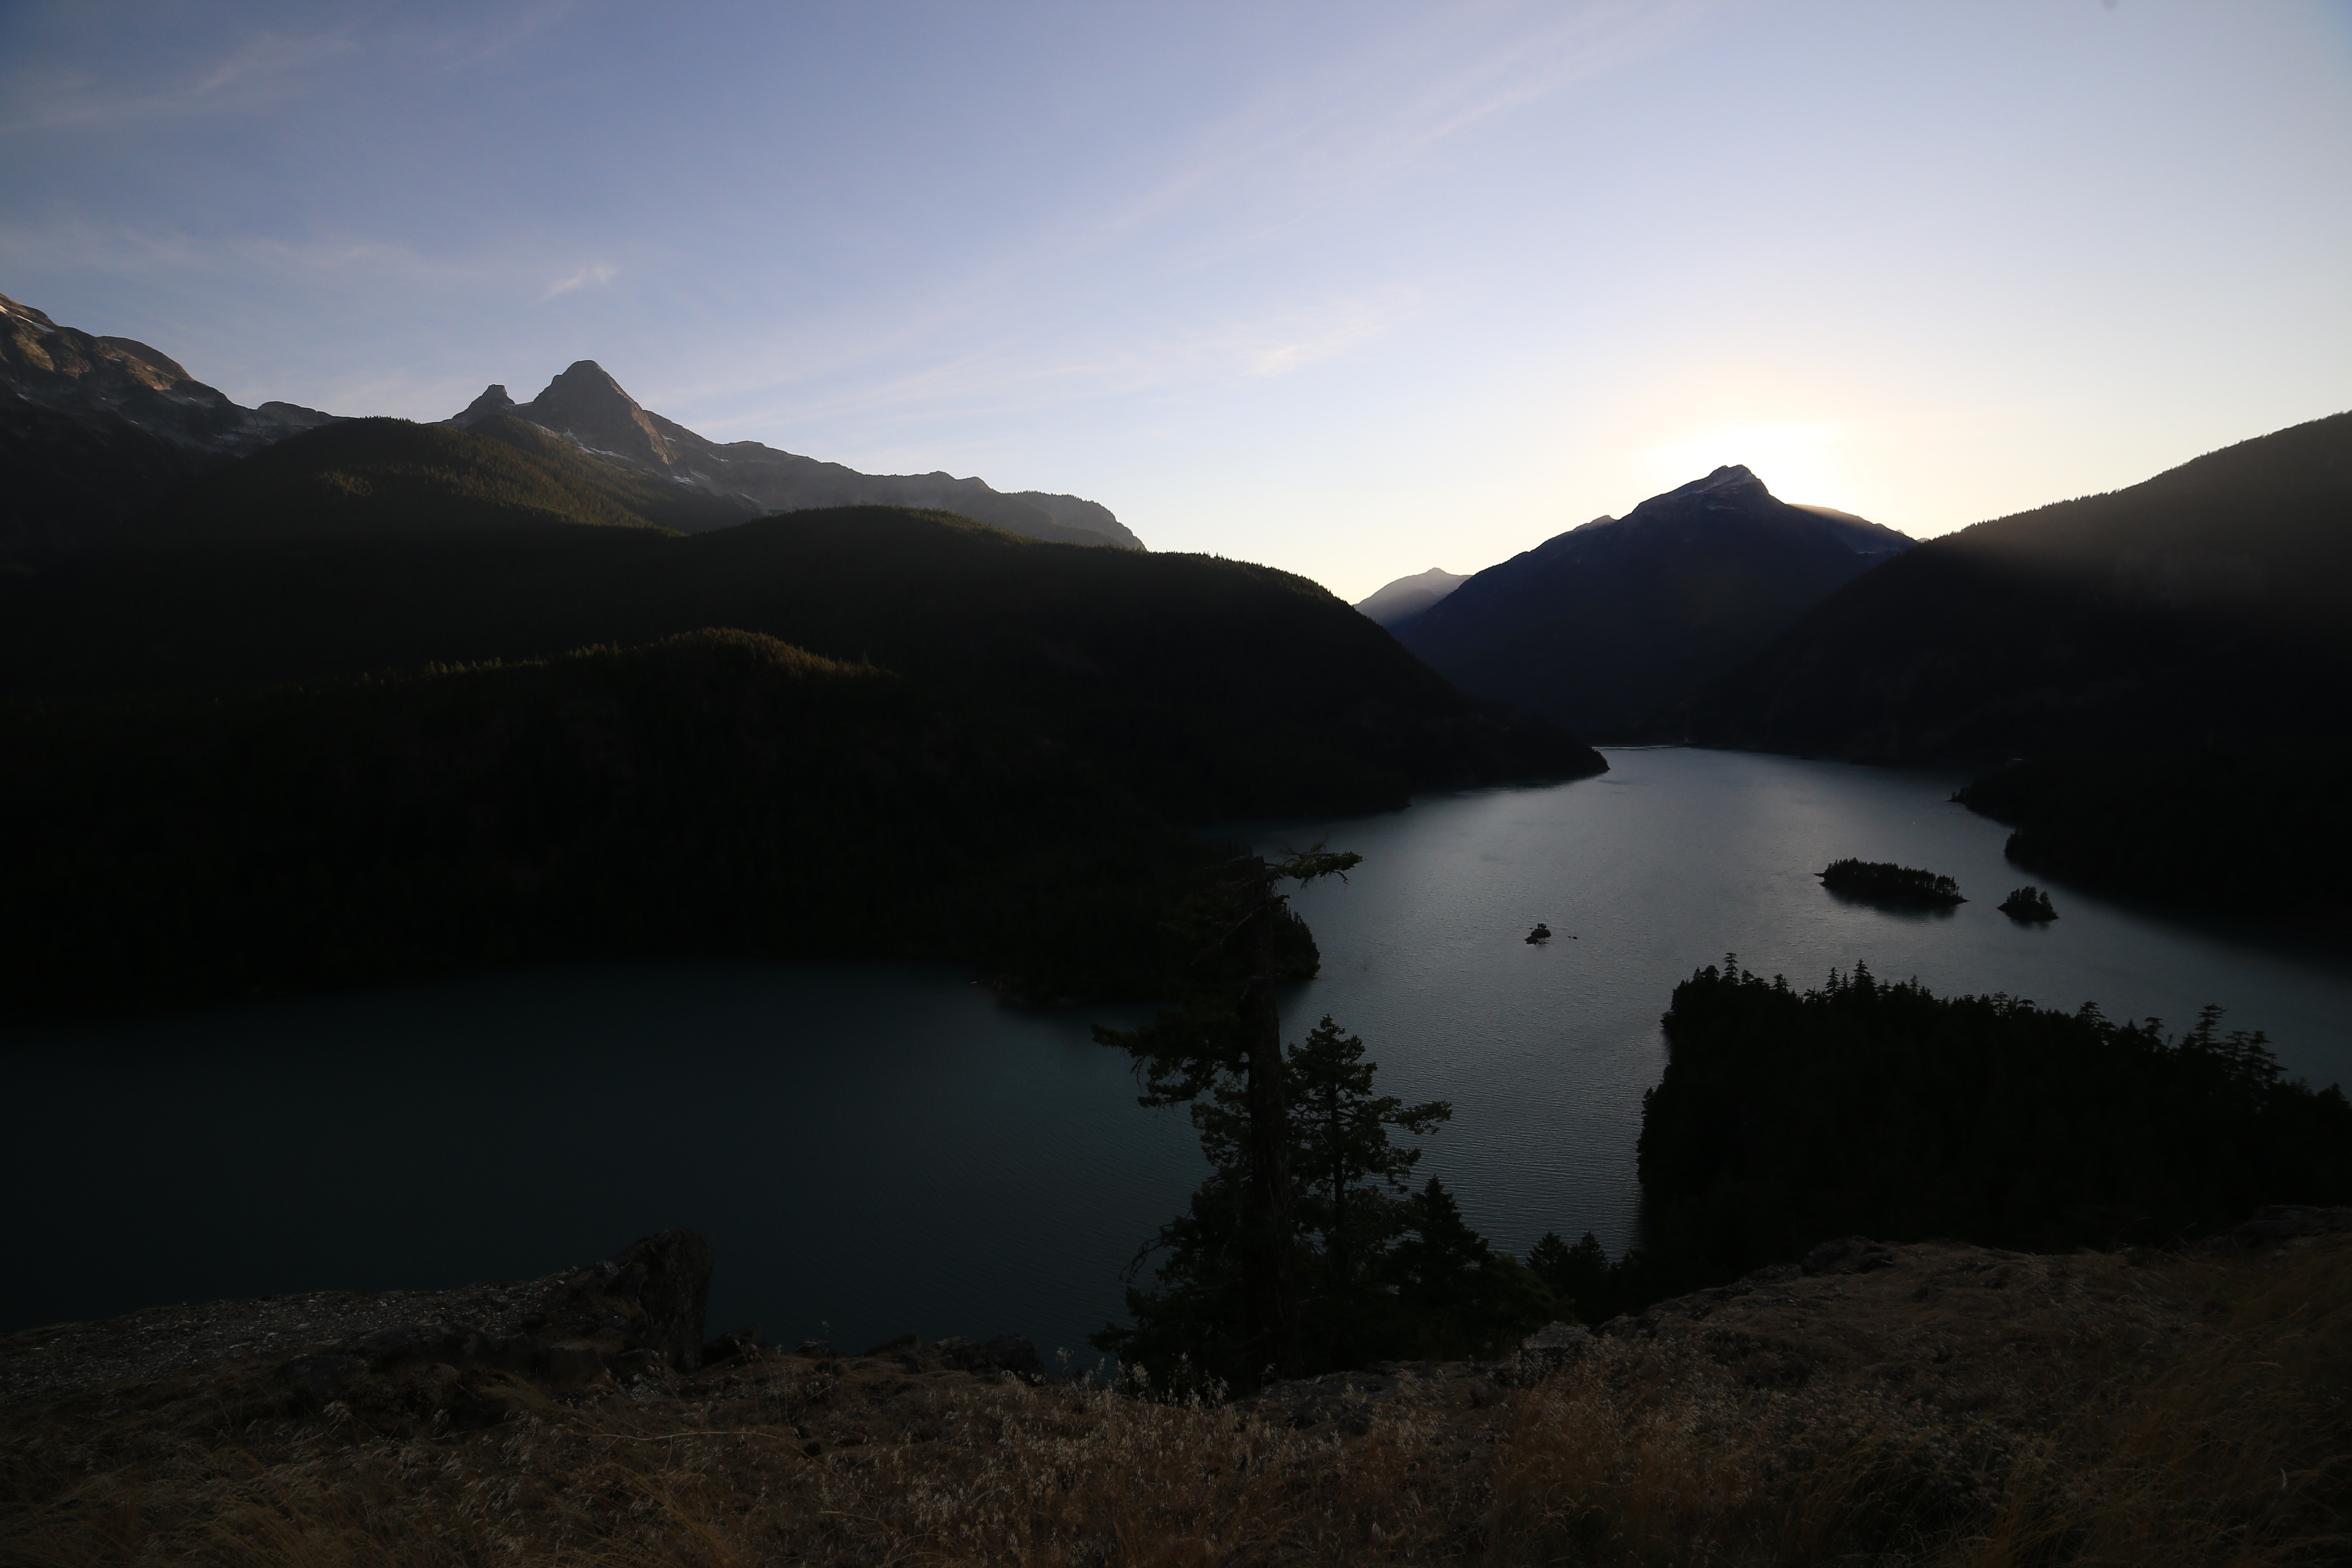
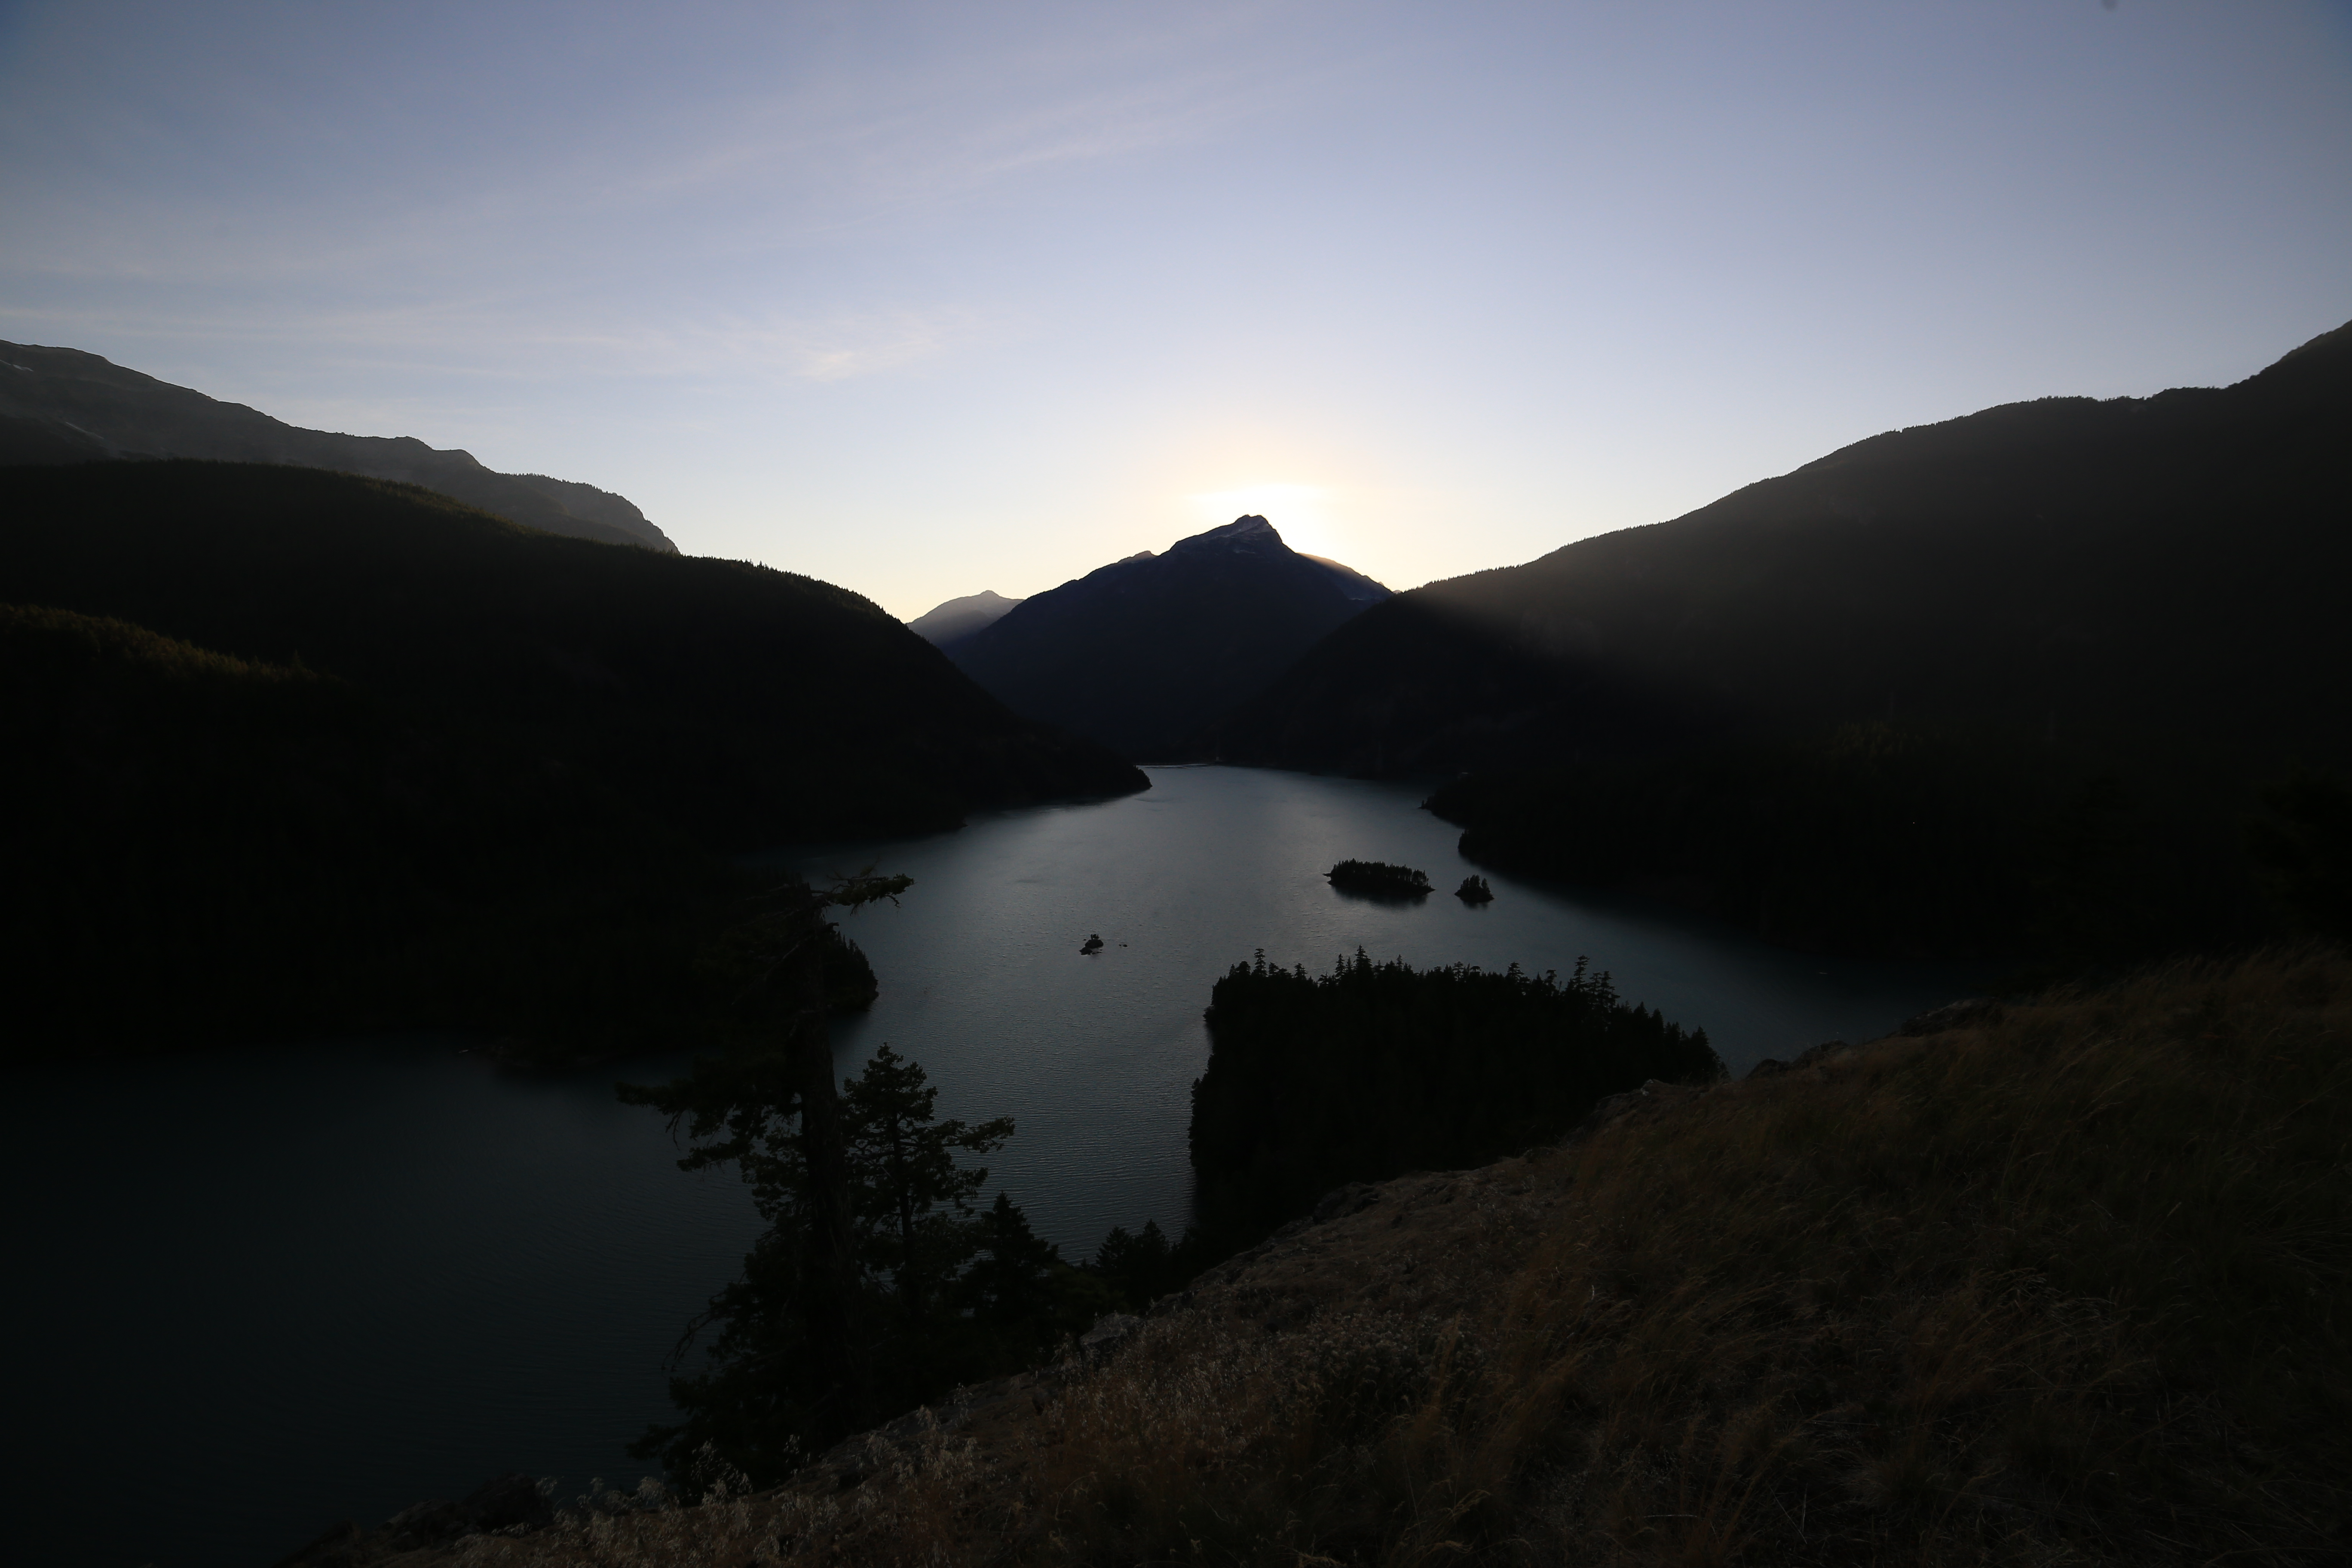
Last night I was at the Diablo Lake Overlook, on the North Cascades Highway just as the sun went down behind the ridge. The light beams spread out laterally casting a wonderful soft light.
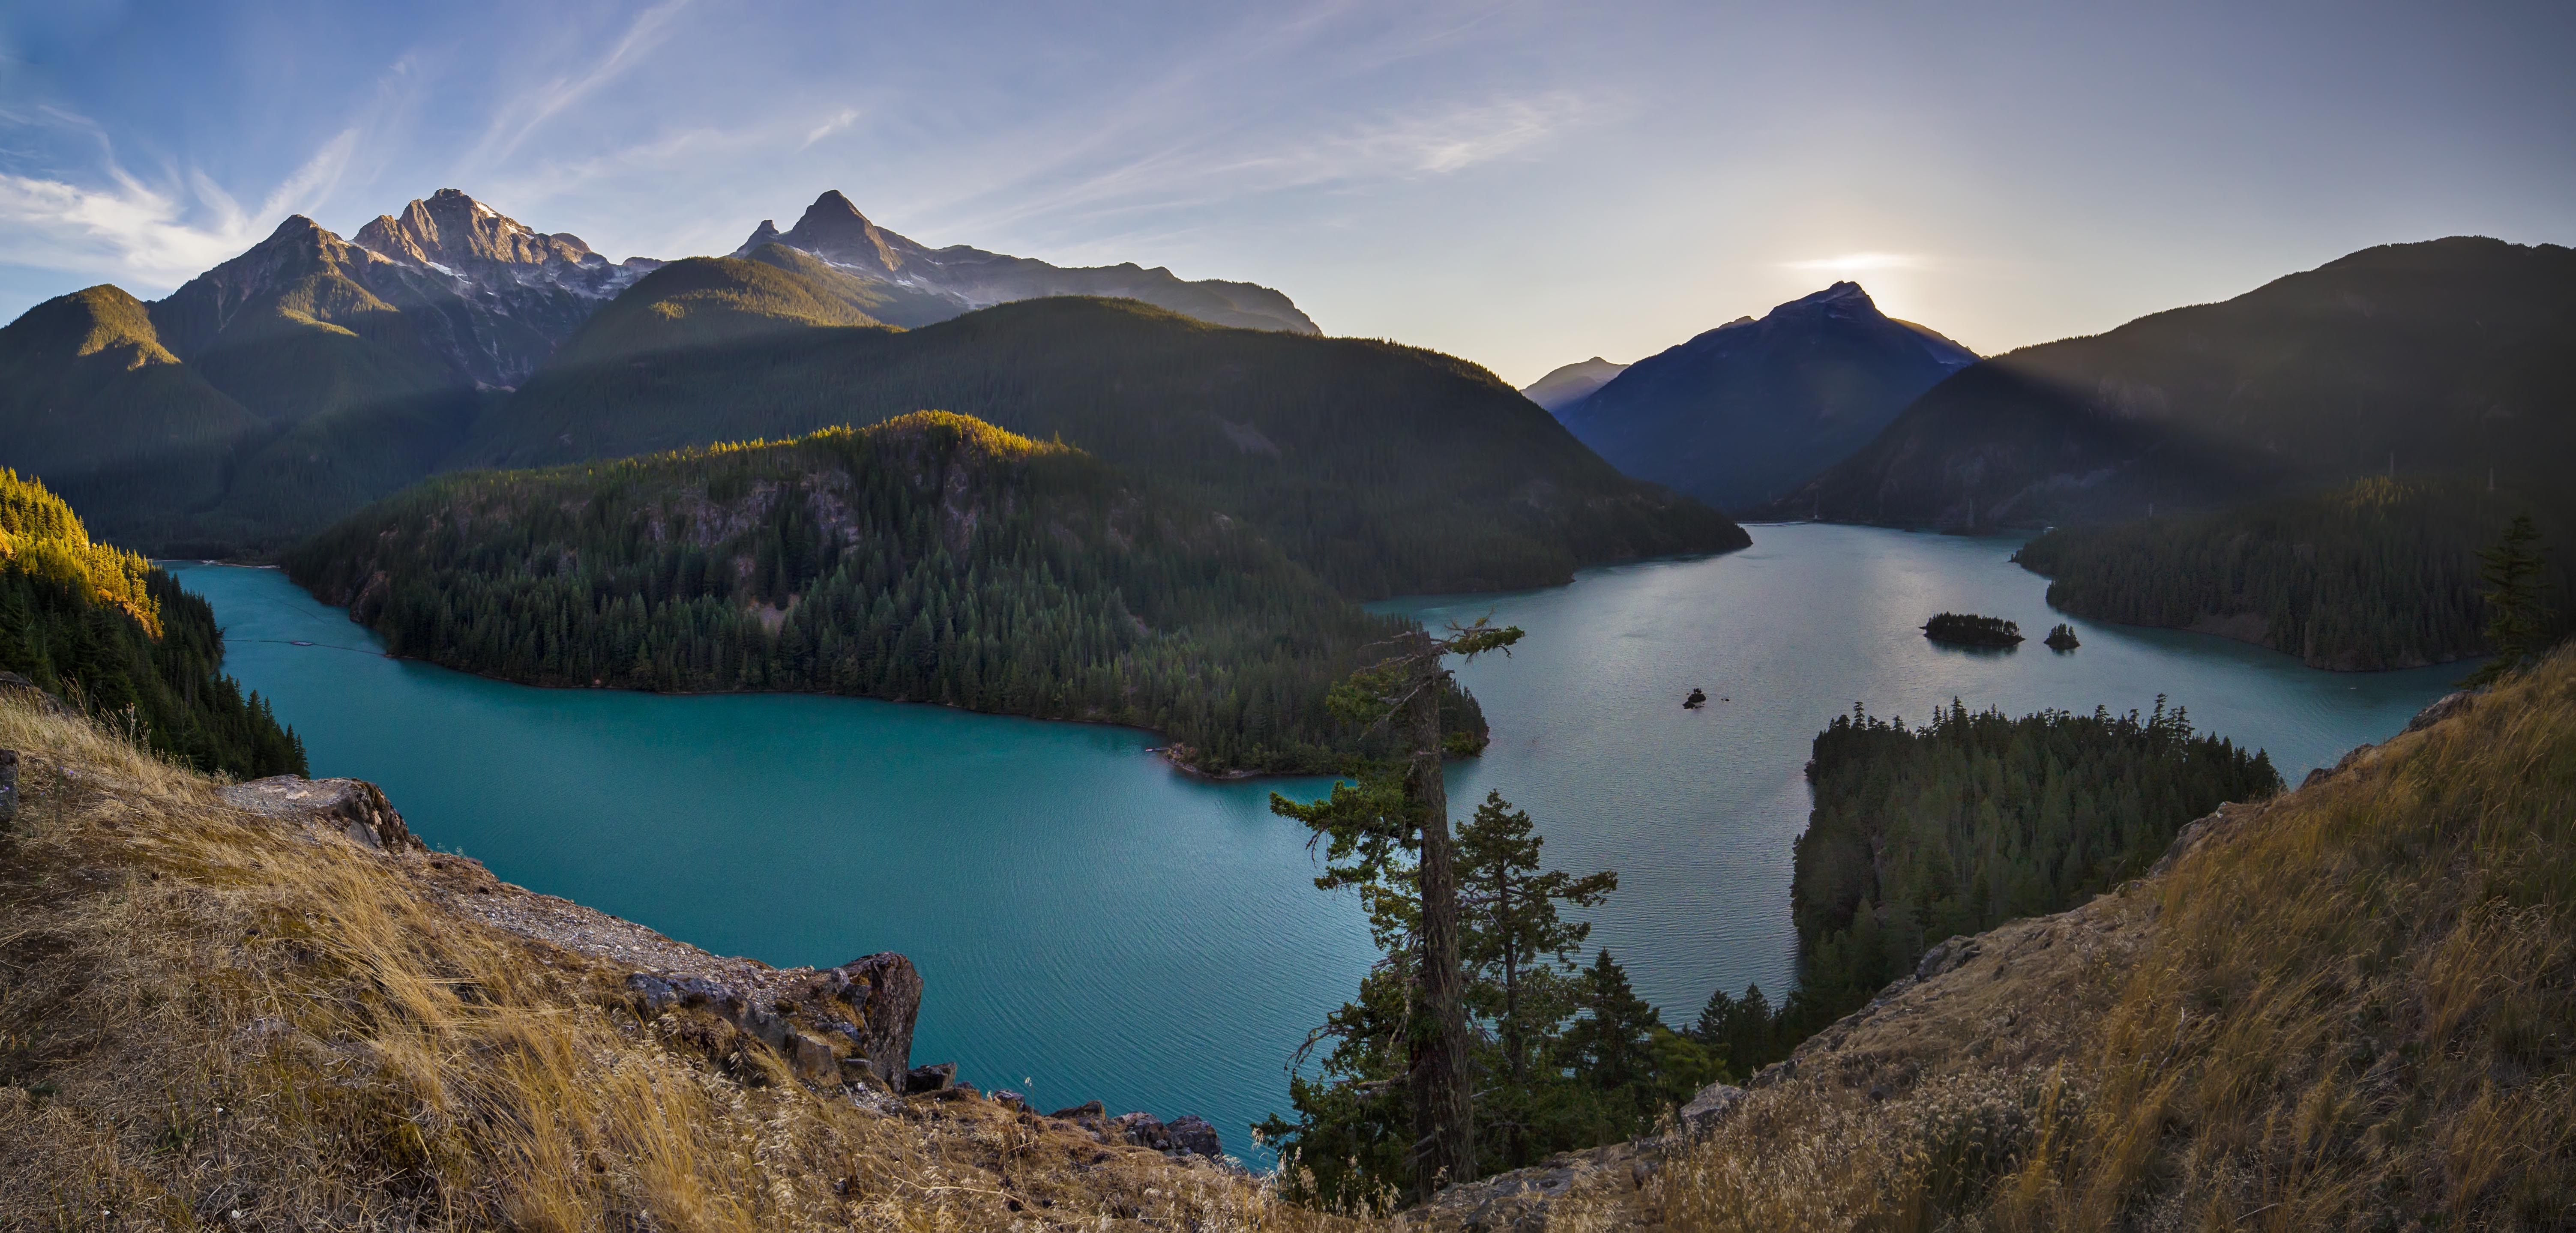
The view was so wide that I decided to take several shots and make a panorama, to try and capture the full width of the scene.
Creating a Panorama
I was using a 14mm lens and stood at the rail of the lookout, I took 3 images, left, center and right, of the scene, no tripod, just hand held, trying to keep the camera level and overlap the three images. I tried to adjust the shutter speed, using the light meter for each shot, trying to adapt for the fact that the right side was brighter.
When I got home I opened these three images in Photoshop, as raw files, and synchronized my editing of them all together. I tweaked the highlights, shadows, clarity, lens distortion and some small color changes. Then I saved the images and, using PS again, went to File – Automate – Photomerge and the computer linked them together.
The merged version needs to be cropped and often the best crop leaves the corners blank. I use the clone stamp tool to copy nearby pixels and replace the bare corners from the crop.
Once they were stitched, I did some more editing, making the shadows brighter and the highlights darker.
And here is the final image!
If you would like to learn how to do this yourself, I provide Private Photoshop Lessons, at your home, or on-line! Here is the link to find out more.
If you would like to go out on a North Cascades Photo Tour and get some hands on training while being out in Nature, here is the link for more info!